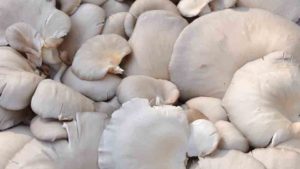
How to Grow Oyster Mushrooms at Home
 Pleurotus ostreatus or Oyster mushrooms are a common edible mushroom. It was first cultivated in Germany as a subsistence measure during World War I. It’s now grown commercially around the globe as food. There are many health benefits of oyster mushrooms. They lower cholesterol levels and even prevent cancer. They also clean up the environment in a nice way.
Recently these mushrooms have become very popular among food lovers and vegetarians. They are easy to grow, and you can do it even at your home. They don’t need a lot of space it can even be done in a cardboard box. Here are some easy steps on how to grow oyster mushrooms indoors.
Things needed: Here are some of the things you need to get started.
Box or a container with space in it, to grow the mushrooms.
- There has to be enough daylight
- It has to be warm, from 10 – 25 degree Celsius.
- A water bottle to keep them moist, a spray bottle would be best.
- A kettle would be useful.
- A supply of cardboard.
- One or two large plastic bags.
- A bowl or a bucket.
- Mushroom spawn, you need a supplier who can provide spawn. You do not need to buy a whole oyster mushroom growing kits.
Getting the cardboard ready: First, you have to make sure there are no germs or other microorganisms living in the cardboard. Soaking it in boiling water is a good method to make it germ-free. It’s known as pasteurization. Oyster mushrooms aren’t good with competing with other bacteria that’s why it’s important.
- Getting the cardboard ready: Egg trays don’t need this treatment. But for cardboard boxes, they need to same squared size (layer the mushroom spawn between the squares) or tear into strips.
- They need to be put in a heat proof container such as bucket; bowl or plastic bag that is heat resistant then you have to boil the water and then pour on the cardboard until it’s completely covered. Put a lid on the heat proof container and wait until it cools for 8 hours or overnight.
Using the spawn:
- Once cool, drain the water by squeezing the cardboard. It’s now ready to be used.
- In the case of using squares of cards or egg trays, put them up in a layer, putting a few spawn between each layer.
- If it’s a cardboard strip, then put it in a plastic bag (bag should be clean) and mix the spawn through them. Once the spawn colonizes then cut eight cross hatch slits in the sides of the bag, and you’re done.
Colonize the cardboard: In this step, the mushrooms must be left on the cardboard in a warm place for the purpose of colonizing.
- Put the egg trays or card strips on another larger plastic bag that does not have any holes in the bottom. Close it to block the fresh air. This process will generate carbon dioxide which will help the mushrooms grow.
- Then put it in a warm place, the temperature has to be at least 10 degree Celsius or more.
- Check the box in a few days; make sure no pools of water have gathered at the bottom. If excess water is found, pour it out.
- Close the bag again and put it in a warm place for 3 – 6 weeks depending on the color.
After 4 – 8 weeks the cardboard should be fully colonized. If not fully colonized keep it in the bag for another week or two.
Collecting the mushrooms: Once fully colonized in the box:
- Open the outer plastic bag so that fresh air can enter, the oxygen will allow the mushrooms to bear fruit.
- Then move it to a place with more light. It needs light to fruit.
- Spray with water regularly, twice a day, avoid watering the mushrooms directly; instead, it is better to spray the inner walls of the outer bag. It’ll help the mushroom bear fruit.
- After a few days small baby pin mushrooms will come out, these are the first fruit. They will grow into beautiful full mushrooms soon.
- Try to harvest before the edge of the mushrooms gets wavy. (Although they are still good to eat even if they do.)
- Harvest the mushrooms by twisting the fruits of the bag; avoid tearing them as they may get damaged.
- Enjoy eating or selling them; get rid of the stems as they are inedible.
Second or later flushes: These are the later flushes.
- Continue the spraying process to mushroom, keep them moist with water once or twice a day, and keep them in a lit place, after 10 – 15 days you will get a second flush of mushrooms.
- Keep spraying, and you may get a third or even a fourth flush at 2 to 3-week intervals. They will be smaller in size, though.
- Once they finish fruiting, add the spent straw to your compost heap if you have one and you may even get another flush of mushrooms.
These are some very easy steps to grow oyster mushrooms at home; you can also use a straw-based mushroom kit if you want to do it even easier. It will help you by showing what these different stages of mushrooms look like and many other handy tools to help you start growing oyster mushrooms in your home with ease.
